Modeling Andean Agricultural Technology: The Chaquitaclla
Figures
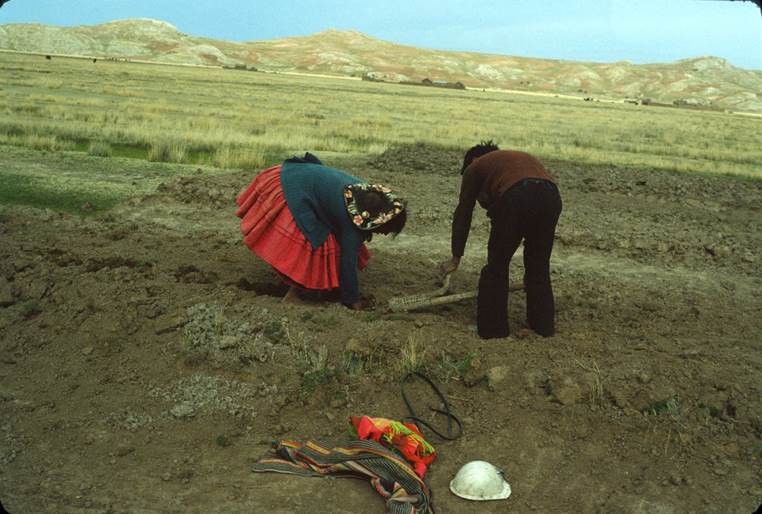
Figure 1. Man using chaquitaclla to loosen the soil while women plants potatoes in Huatta, Peru 1983. (photograph courtesy of Clark Erickson)
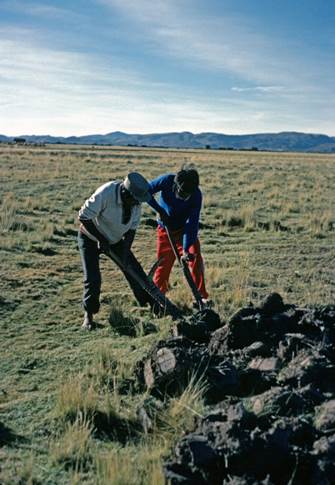
Figure 2. Two men work side-by-side, each with their own chaquitaclla, to turn over blocks of sod in Huatta, Peru, 1983. (photograph courtesy of Clark Erickson)
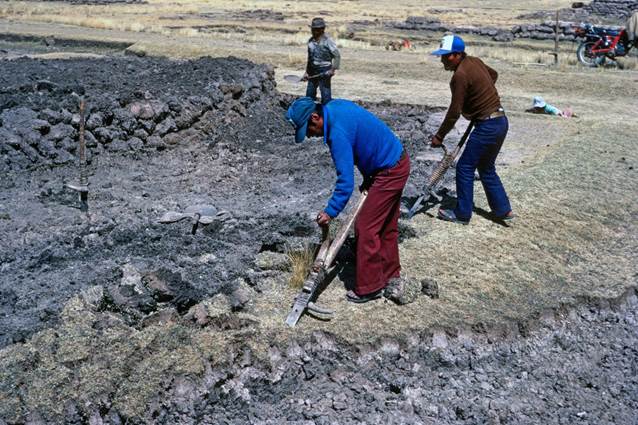
Figure 3. Two men work side-by-side turning over blocks of sod in Huatta, Peru, 1983. (photograph courtesy of Clark Erickson)
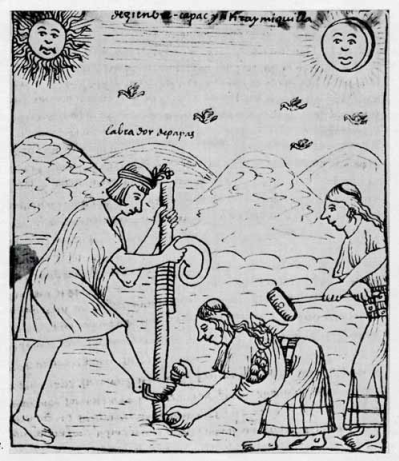
Figure 4. Sowing the potato with the chaquitaclla. From a sixteenth century manuscript by Guaman Poma de Ayala discovered in 1908 in the Royal Danish library in Copenhagen. (Gade and Rios 1971).
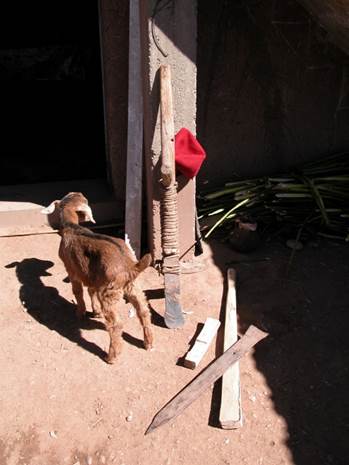
Figure 5. Completed chaquitaqlla resting against a wall, and the individual components (footrest, handle, blade, and main shaft) resting on the ground before being assembled, Huatta Peru, 2002. Note the polish on the steel blade and handle on the weathered and heavily used tool. Also note the two different blade tips on the reversable steel blade of the unassembled tool below. (Photograph courtesy of Clark Erickson)
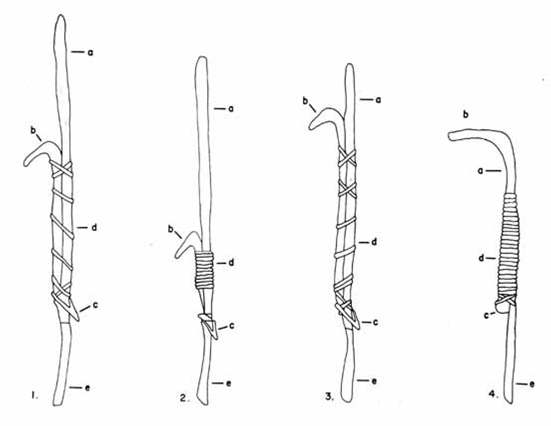
Figure 6. Illustration depicting individual components of the chaquitaclla and regional variations in form. (drawing by Raymon Rios; Gade and Rios 1971).
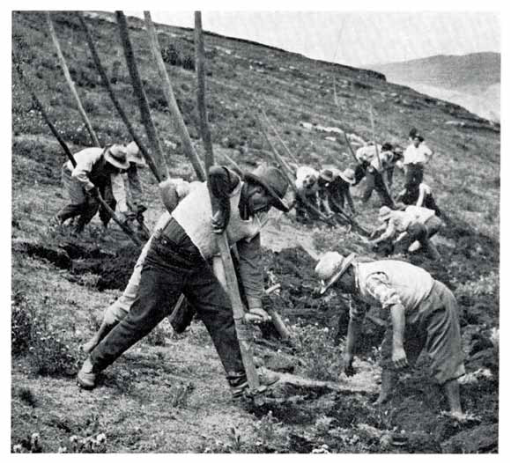
Figure 7. Unusually long chaquitacllas, made of eucalyptus saplings, used in Huánuco, Peru, in 1966. (Photograph by M. A. Barash; Gade and Rios 1971)
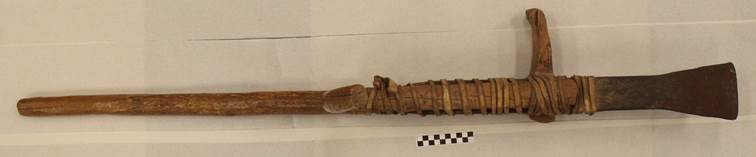
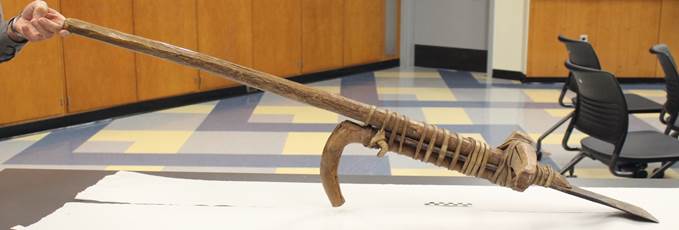
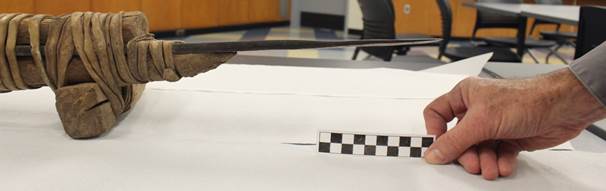
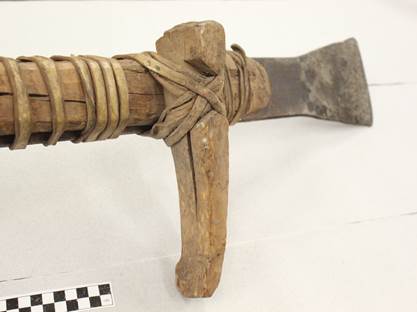
Figure 8. Chaquitaclla, top and side view and details.
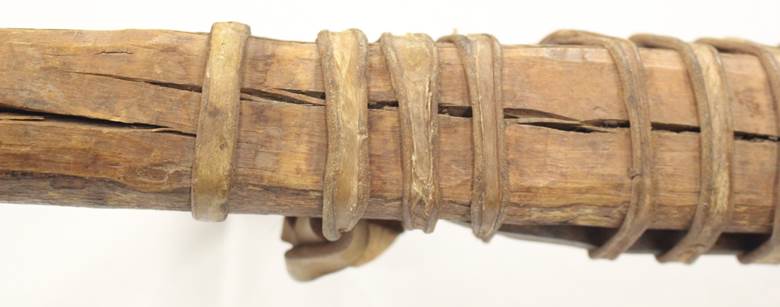
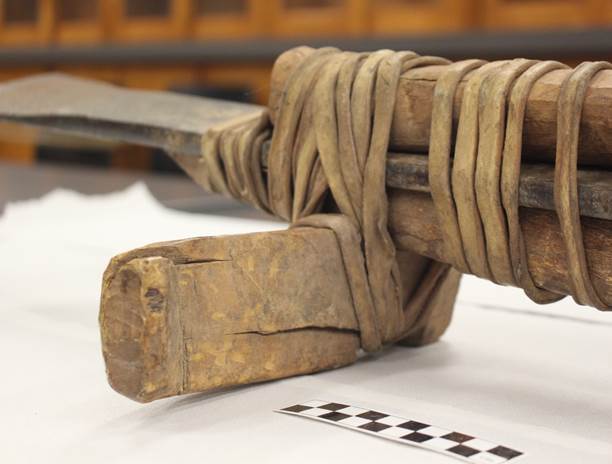
Figure 9. Chaquitaclla, detail of leather binding and wood cracking.

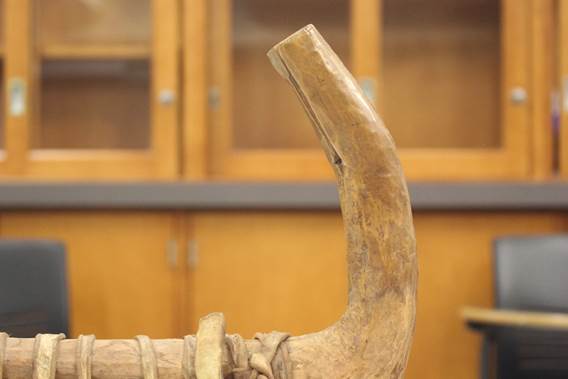
Figure 10. Chaquitaclla, detail of highly variable wood texture visible on shaft and handle.
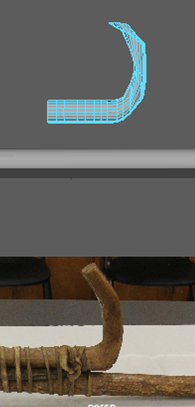
Figure 11. First (and failed) attempt at modeling the handle.
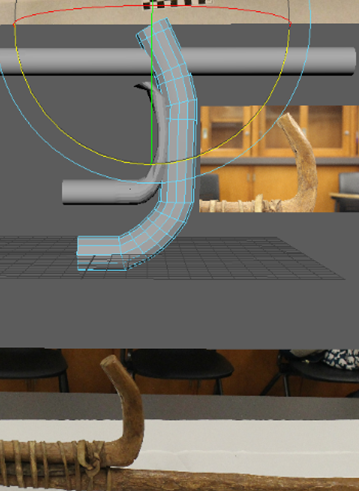
Figure 12. Successful attempt at modeling the handle by extruding and rotating sections of a cylinder.
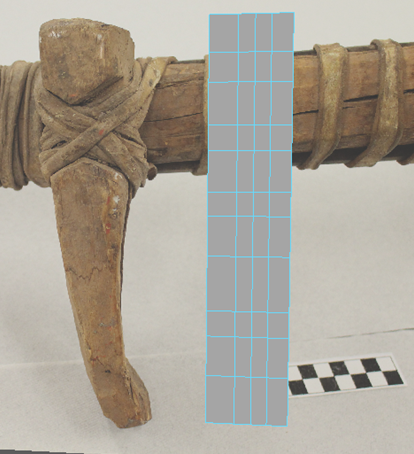
Figure 13. Adding edge loops to the footrest to facilitate further manipulations.
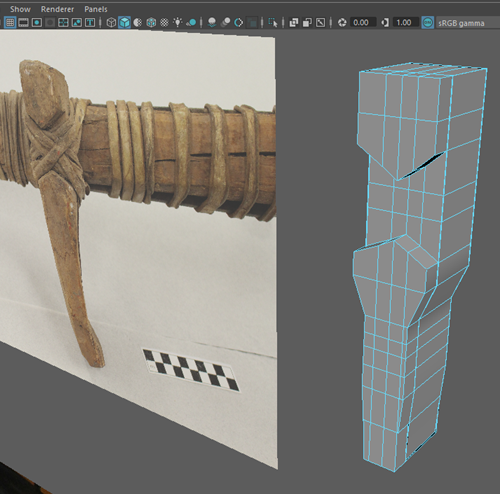
Figure 14. Extruding the surface to produce the concave portion where the straps connect the footrest to the rest of the tool.
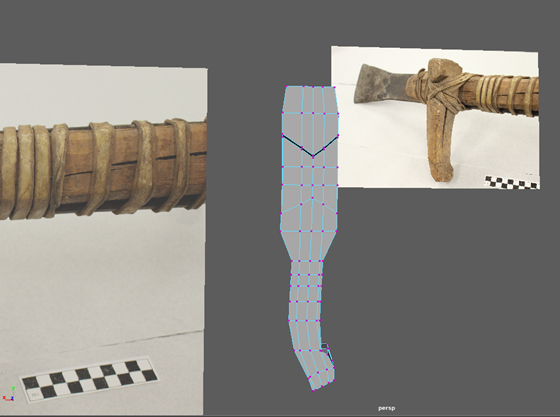
Figure 15. Extruding the bottom portion of the footrest with soft select to produce the irregular geometry.
Figure 16. Comparing an online wood texture with Maya’s wood texture.
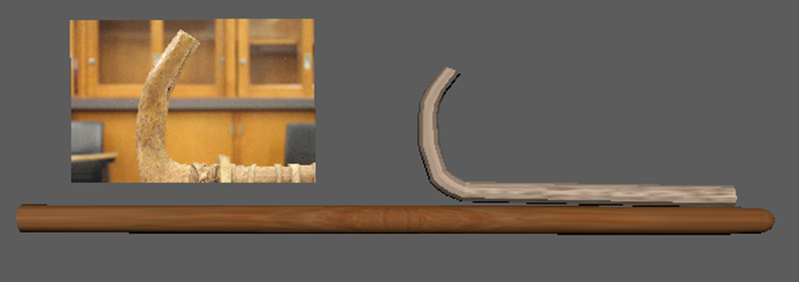
Figure 17. Final wood texture selection compared to Maya’s wood texture.
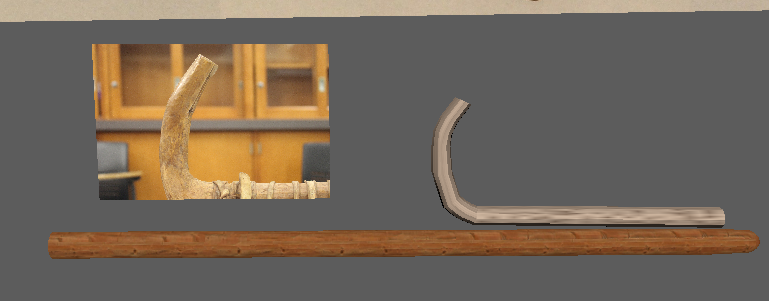
Figure 18. Adding bump mapping so the wood texture becomes more realistic.
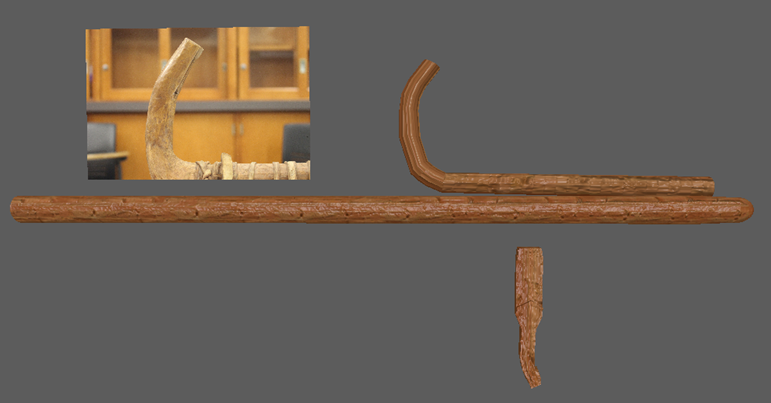
Figure 19. Applying the wood texture to the other wooden components of the tool.
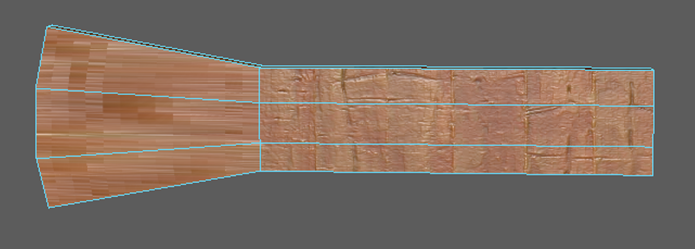
Figure 20. Applying the same, but lightened, wood texture to the blade.
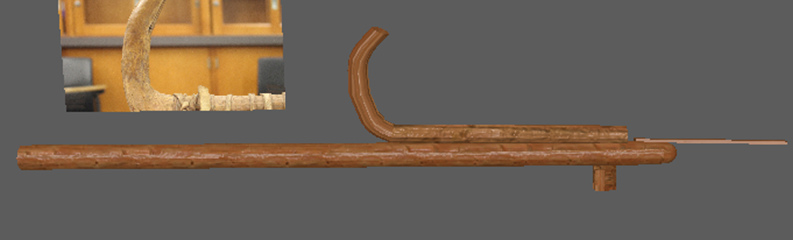
Figure 21. Positioning the components together.
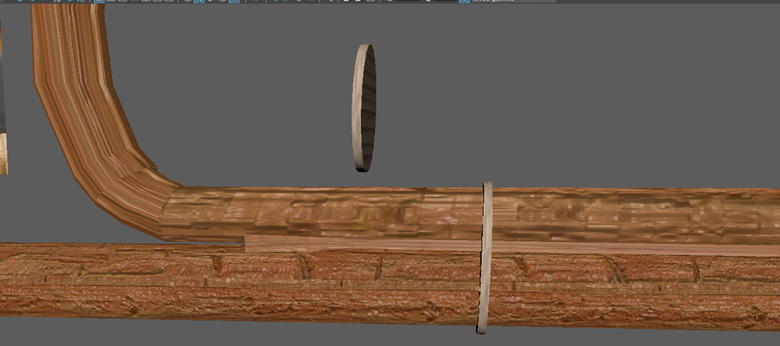
Figure 22. Simulating the appearance of leather straps with cylinders strategically placed along the tool.
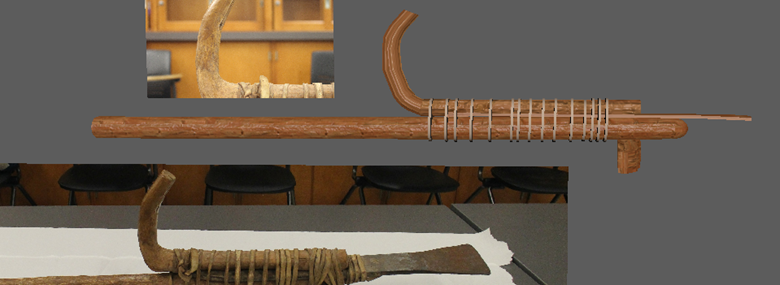
Figure 23. Adding more “straps”.
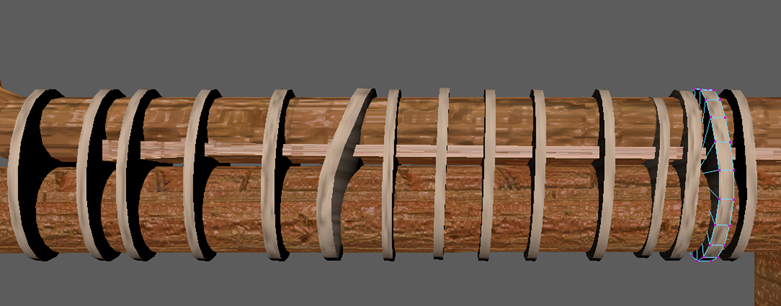
Figure 24. Adjusting each strap with soft select and the “translate” and “scale” tools.
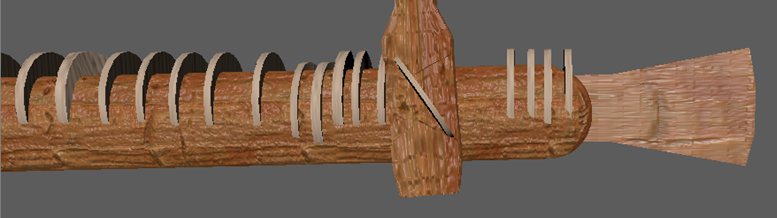
Figure 25. Attempting to use a similar approach to the straps for the footrest.
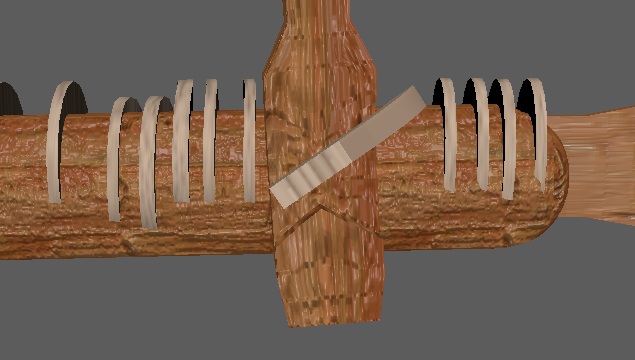
Figure 26. Attempting to use an extruded cube I modeled in the shape of a strap.
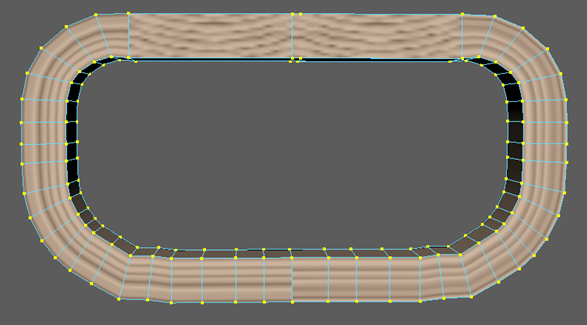
Figure 27. Enlarged view of third footrest strap attempt.
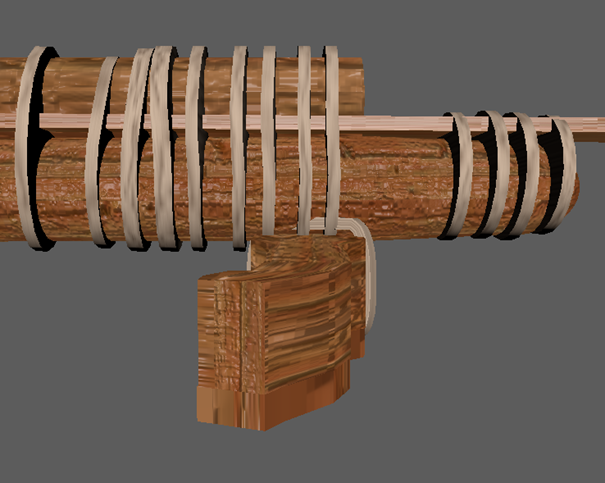
Figure 28. Positioning the strap on the footrest.
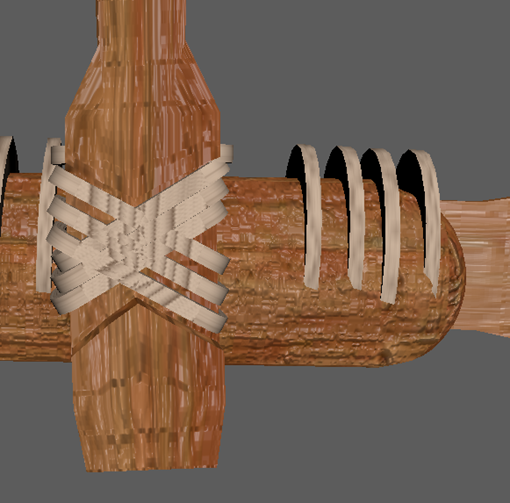
Figure 29. Duplicating and positioning straps on the footrest to emulate pattern.
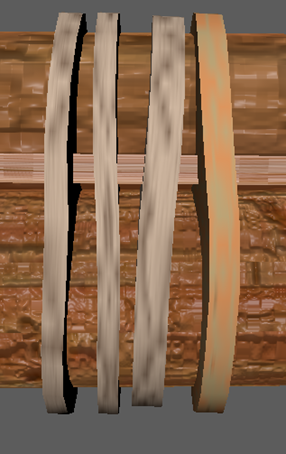
Figure 30. Texturing the leather straps with Maya’s native leather texture.
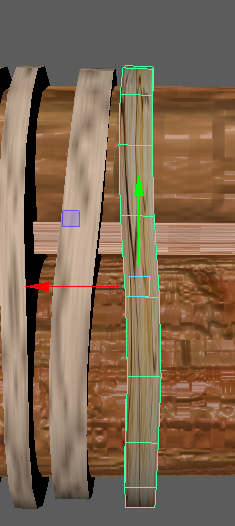
Figure 31. Texturing the straps with a leather texture I found online.

Figure 32. Beginning to position the human model with the tool.
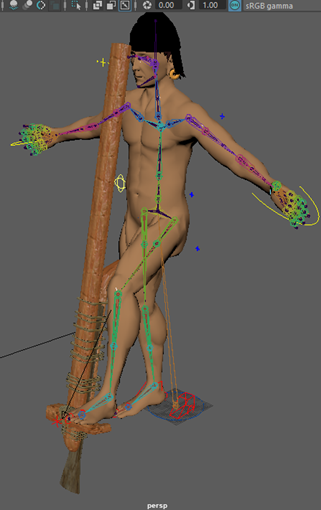
Figure 33. Manipulating the rig such that it looks like it’s beginning to place weight onto the footrest.
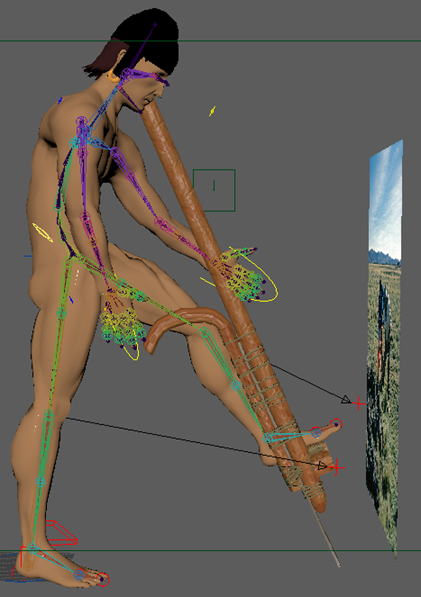
Figure 34. Moving the hands to hold the tool.
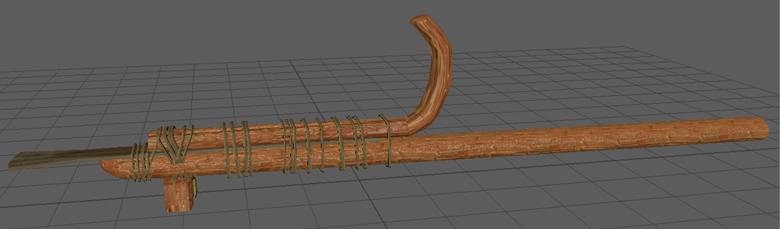
Figure 35. Final chaquitaqlla model.
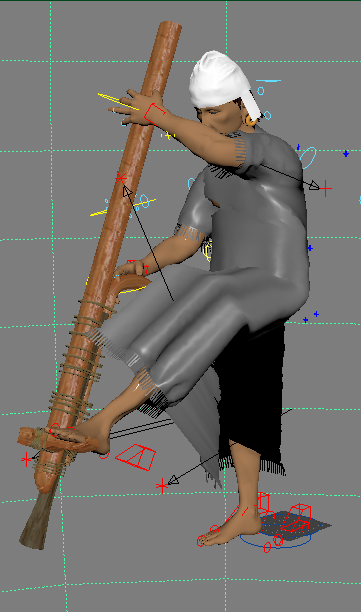
Figure 36. Final positioning of the human model with the chaquitaclla.